Did You Know...?
Although we have a camera tool in our SMART Notebook floating tool bar, the images we create using this tool are not always compatible with other software, like Microsoft Word. A very versatile and easy to use tool can be found right within your Windows programs and it is called the 'Snipping Tool.' Images that you capture using this tool can be saved, or copied and pasted into almost any other program that you are working in. Here are a few steps on how to find it and how to use it:

Step 1.) Go to the Windows icon in the bottom left corner of your bottom toolbar.
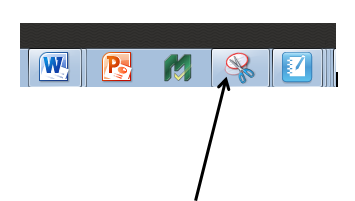
Step 2.) Start to type in the name 'Snipping Tool' and the icon should appear in the list of matching programs. I use this tool so frequently that I have dragged the icon and dropped into my lower tool bar so that it is always available to me and I do not have to search for it in this way each time that I use it.
Step 3.) Once you click on this icon, it will launch a new window. You will then be able to drag your cursor to capture exactly what you want to without needing to crop anything as you would need to if you just used a screen shot instead. The image that you create can be saved to be used again and again, or can simply be copied and pasted into what you need it for.
Here is a video that came out as a part of the district's most recent tech newsletter (Dec. 2016) that is about the same tool. Click here to access the video link.
Here is a video that came out as a part of the district's most recent tech newsletter (Dec. 2016) that is about the same tool. Click here to access the video link.